Paper Plate Christmas Wreath Kids Craft (With a Cute Paper Candle!)

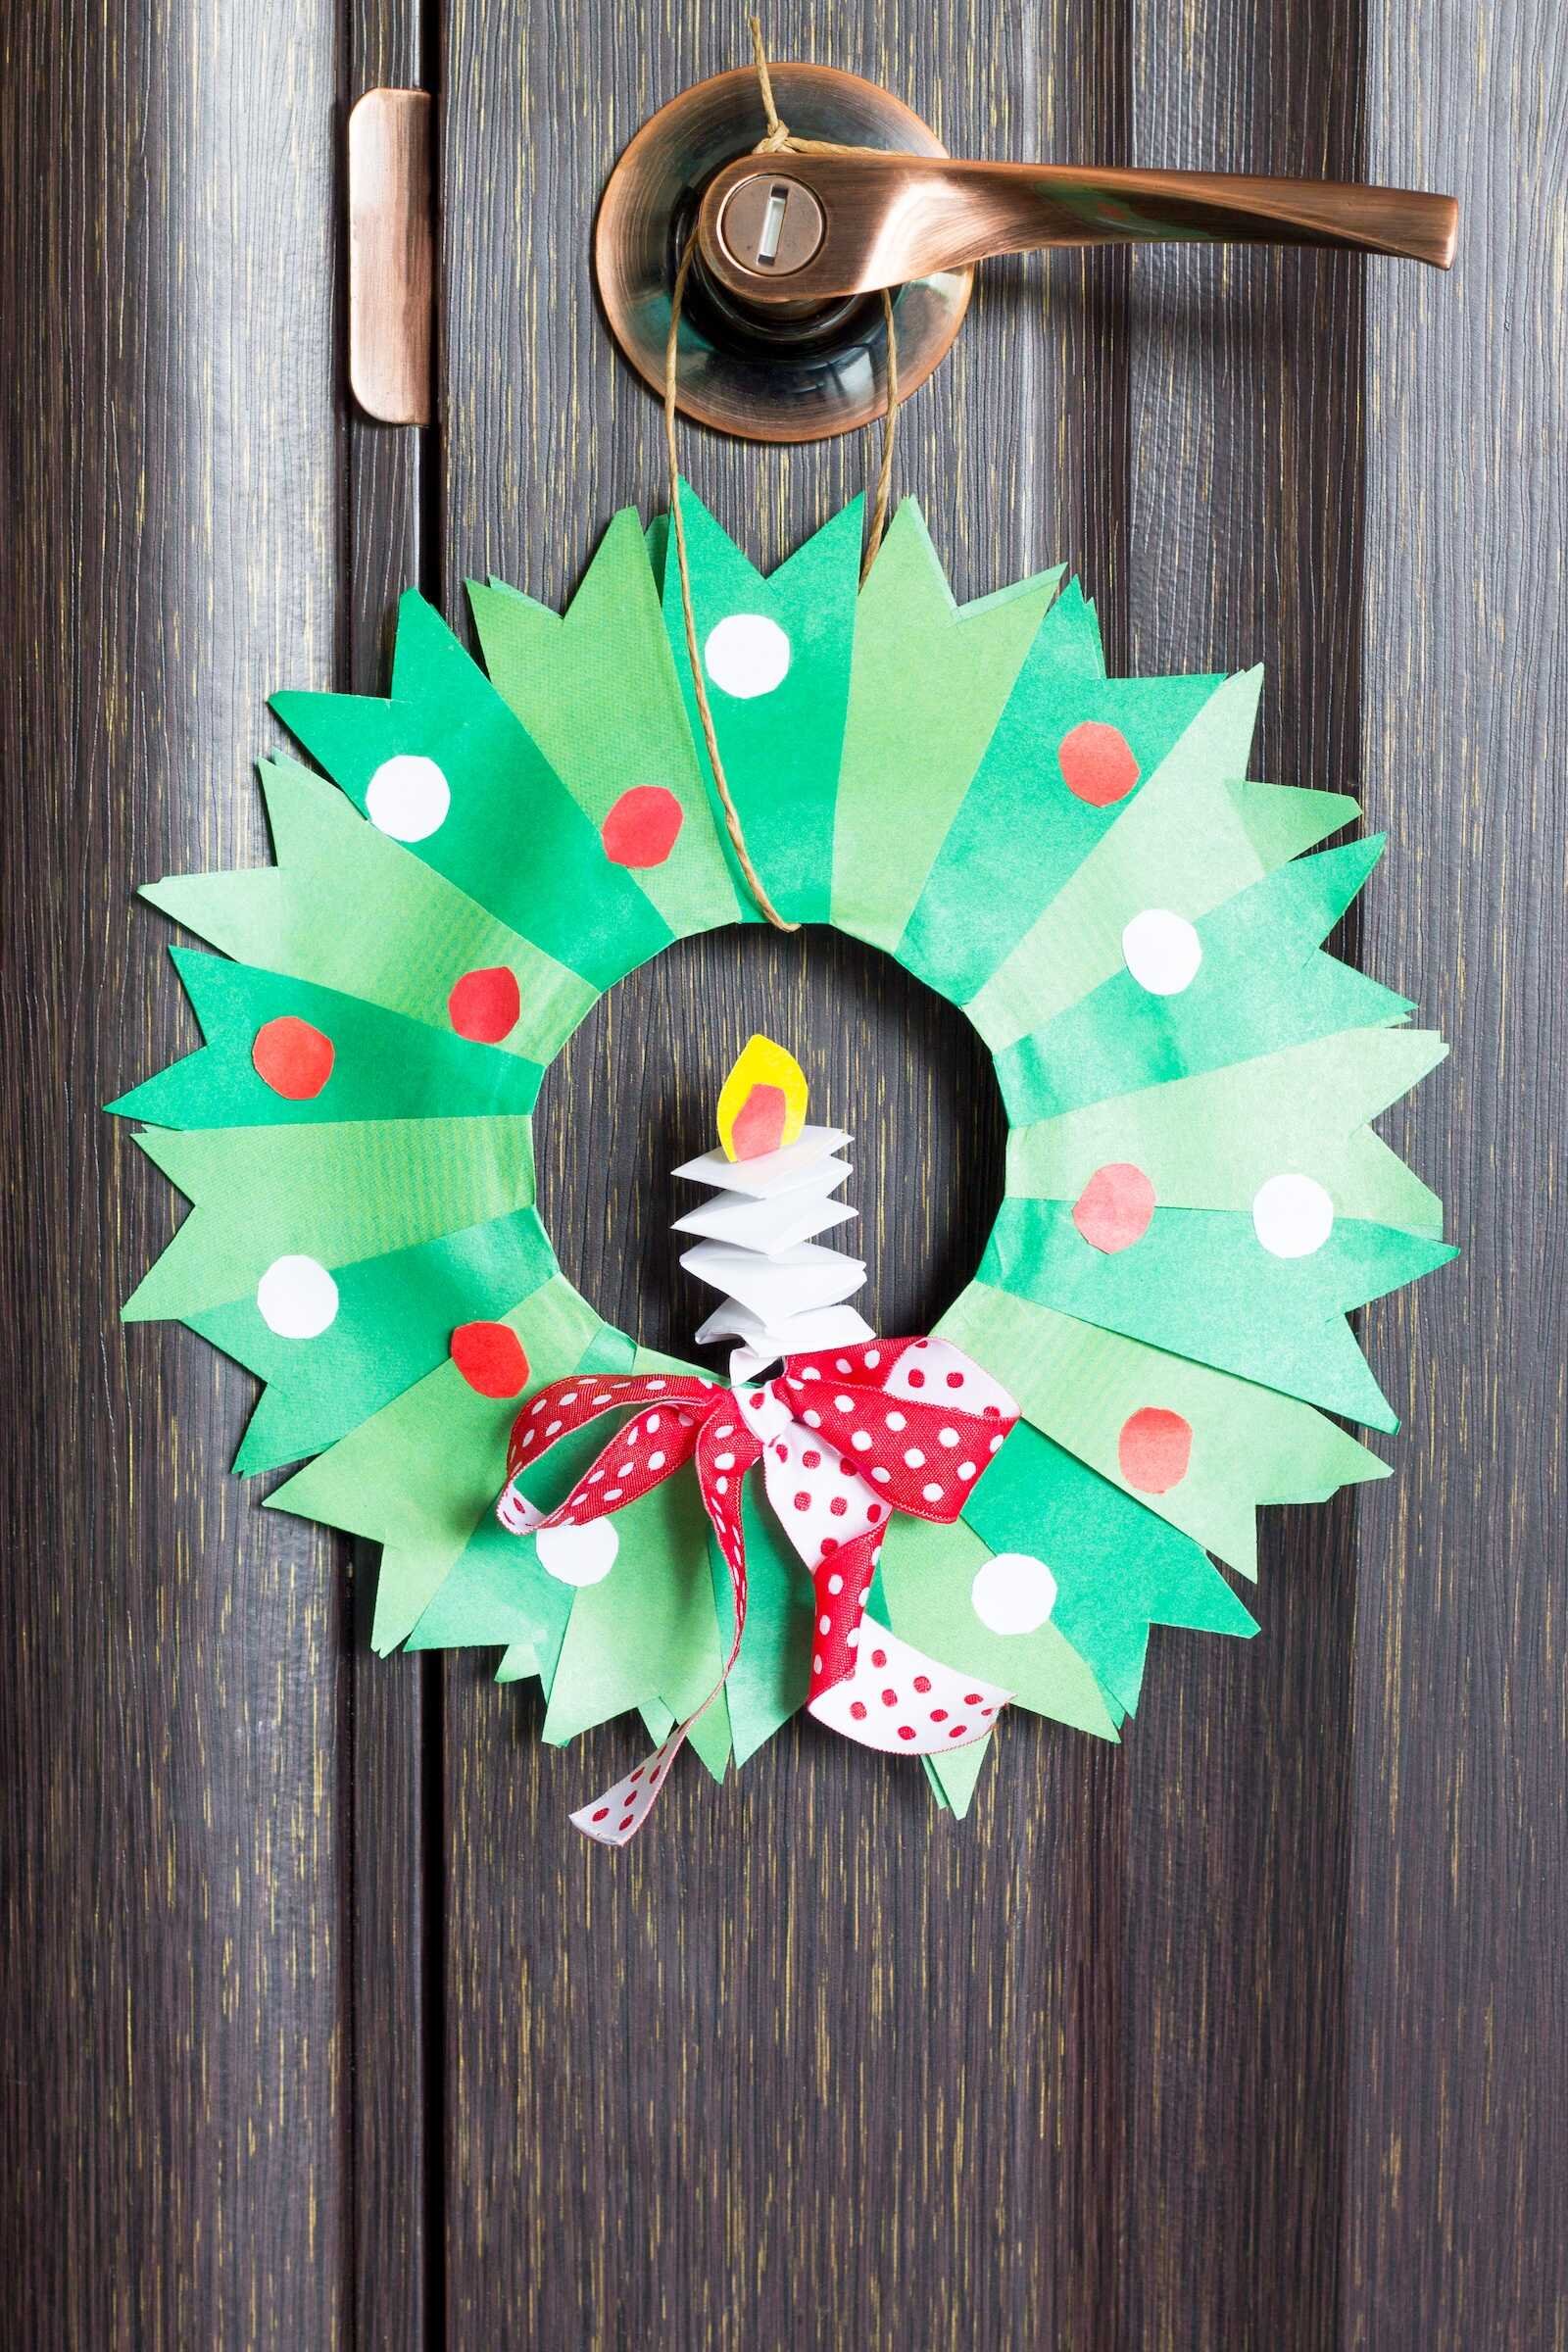
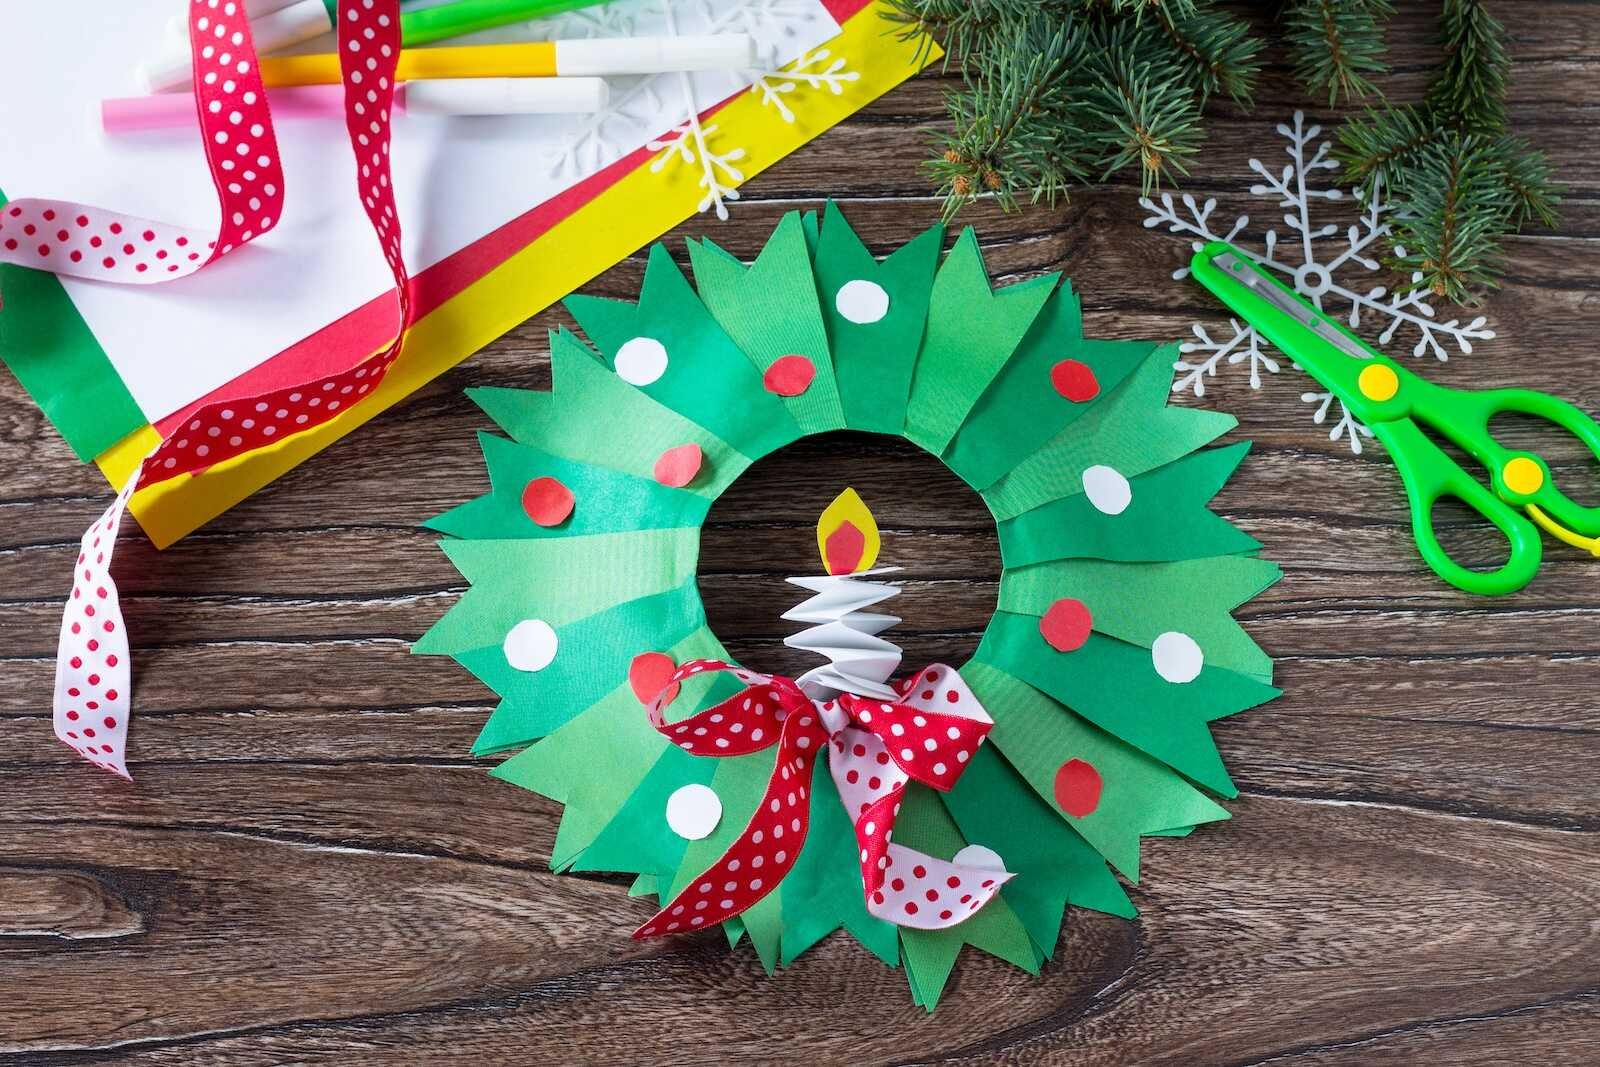
If you’re looking for a Christmas craft that feels fancy but is still totally kid-friendly, this Paper Plate Christmas Wreath Kids Craft is it. It uses simple supplies (paper plates, green paper, glue, and scissors), but the finished wreath looks bright, layered, and festive—especially with the adorable 3D paper candle and ribbon bow in the center.
This is the kind of craft that works for preschoolers with help, is fun for elementary kids, and even looks sweet enough to hang on your front door, classroom bulletin board, or living room wall for the holiday season.
Below you’ll find a complete supply list plus step-by-step instructions, which will make crafting super easy and fun!
Table of Contents
Why You’ll Love This Paper Plate Christmas Wreath Craft
- Budget-friendly: You probably already have most supplies at home.
- Great for fine-motor practice: Cutting, gluing, folding, and placing dots are all perfect for little hands.
- Easy to customize: Use different greens, add glitter, swap the candle for a bell, or add a name tag.
- Makes a sweet keepsake: Date the back and save one each year!
Supplies You’ll Need
Base & greenery
- 1 white paper plate (standard size)
- Green construction paper (2–3 shades looks extra pretty)
- Scissors (kid-safe scissors work great)
- Glue stick or school glue
Decorations
- Red construction paper (for “berries”)
- White construction paper (for “snow” dots)
- Hole punch (optional but helpful for perfect circles)
- Red-and-white ribbon (polka dots look adorable)
- Stapler (adult help recommended)
Paper candle (centerpiece)
- White paper strip (about 1–1.5 inches wide and 8–10 inches long)
- Yellow paper (flame)
- Red/orange paper (inner flame)
Hanging
- String, twine, or yarn
Optional extras
- Markers (for details)
- Glitter glue
- Foam dots (for quick decorating)
Prep Tip (Makes Craft Time Way Easier)
Before kids start gluing, do these quick prep steps:
- Cut the paper plate into a wreath ring: Cut out the center circle so it looks like a donut.
- Pre-cut a few green strips: Especially for younger kids, having a stack ready saves time.
- Set out a “decorating tray”: Put red/white circles and ribbon pieces in a small bowl so they don’t scatter everywhere.

Step-by-Step: Paper Plate Christmas Wreath Kids Craft
Step 1: Make Your Paper Plate Wreath Base
Start with a plain white paper plate. Cut out the center to create a ring (like a donut). This ring is your wreath base.
Kid tip: If you draw a circle in the middle first, kids can follow the line with scissors (or adults can cut the center out to help).
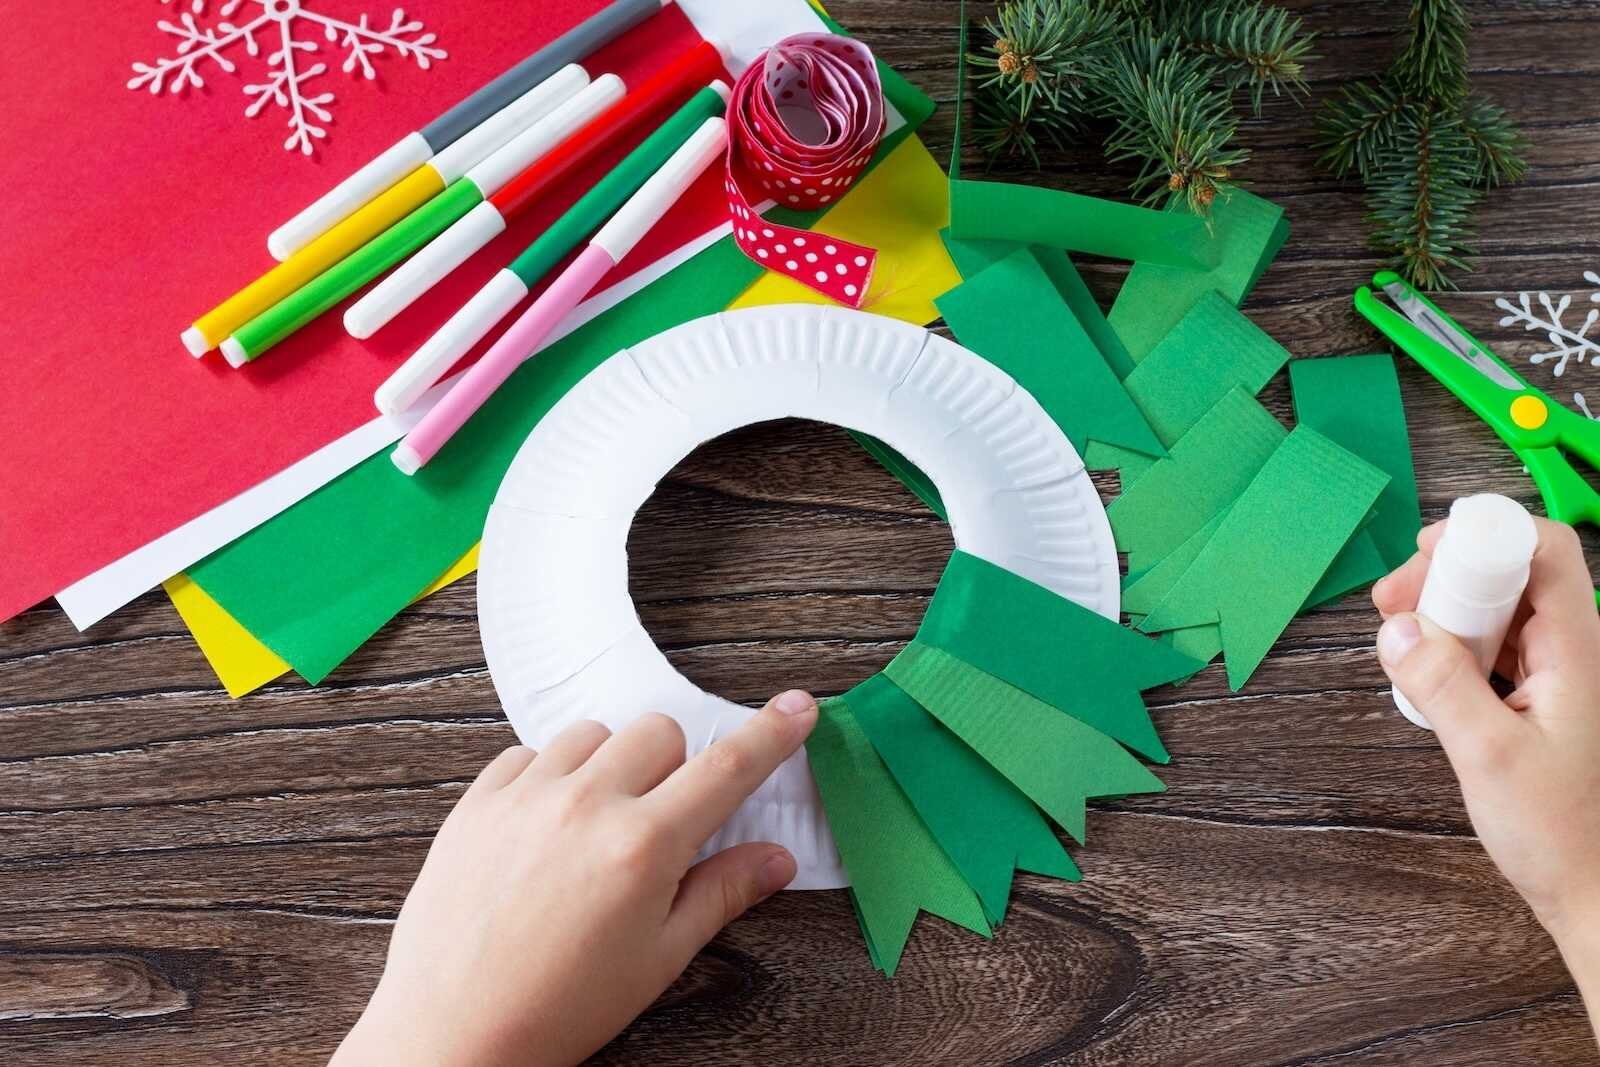
Step 2: Cut the Green “Wreath Leaf” Pieces
Cut green construction paper into strips about 1–1.5 inches wide and 4–6 inches long. Then, cut a V-shape at one end of each strip so it looks like a pointed leaf or pine needle bundle.
In the images, you’ll notice:
- Multiple shades of green are used for a layered look.
- The pointed ends give the wreath that classic “holiday greenery” shape.
Quick shortcut: Fold a strip in half and snip a triangle from the open end to create the V-shape faster.
Step 3: (Optional) Add a Little Curve for Dimension
To make your wreath look more 3D, gently curl each green strip by rolling it around a marker or pencil for a second. This step is optional, but it helps the “leaves” pop up instead of lying flat.
Step 4: Glue the Green Pieces Around the Plate Ring
Now the real wreath magic happens!
- Flip the paper plate ring over (so the back is facing up).
- Apply glue to the straight end of a green strip.
- Attach it to the ring so the pointed end sticks out past the outer edge.
- Continue overlapping the strips all the way around.
In the photos, the strips overlap in a consistent pattern, forming a full, spiky wreath shape.
Spacing tip: Keep the strips fairly close so the white paper plate doesn’t show through much.
Step 5: Add a Second Layer (For a Fuller Wreath)
Once the first layer is complete, add another round of green pieces—either on top of the first layer or slightly tucked between pieces.
This is where using different shades of green looks especially pretty. It creates a realistic “wreath” vibe without needing anything fancy.
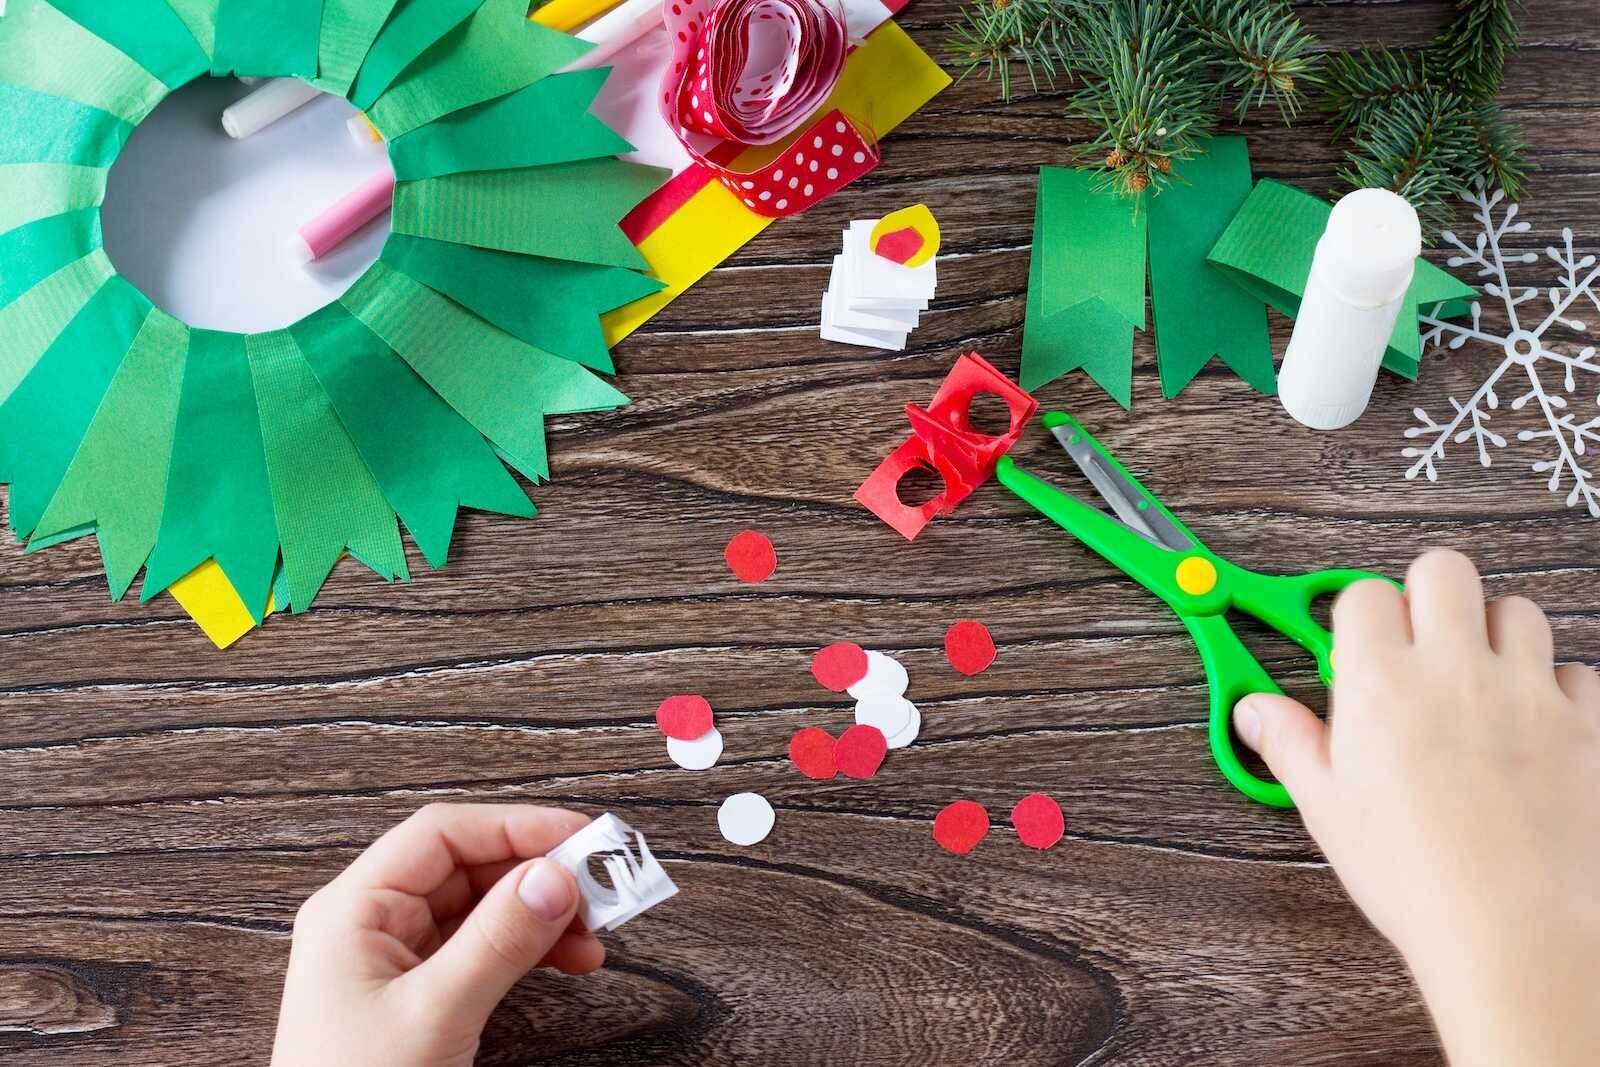
Step 6: Make the Red and White Dot Decorations
For the classic wreath look, add red berries and white snow dots.
You can:
- Punch circles with a hole punch (fast + uniform), or
- Cut small circles by hand (kids can practice scissor skills)
In the images, the dots are scattered evenly around the wreath, mixing red and white for balance.
Kid-friendly tip: Give kids a small pile of circles and let them “design” their own pattern before gluing.
Step 7: Glue the Dots Onto the Wreath
Use a glue stick or small dots of school glue to attach the circles.
A simple pattern idea:
- Place one red, then one white, and repeat around the wreath.
- Or cluster 2–3 red circles together to look like berry bunches.
Step-by-Step: Make the 3D Paper Candle (Centerpiece)
This candle is the cutest part—and it looks impressive, but it’s simple!
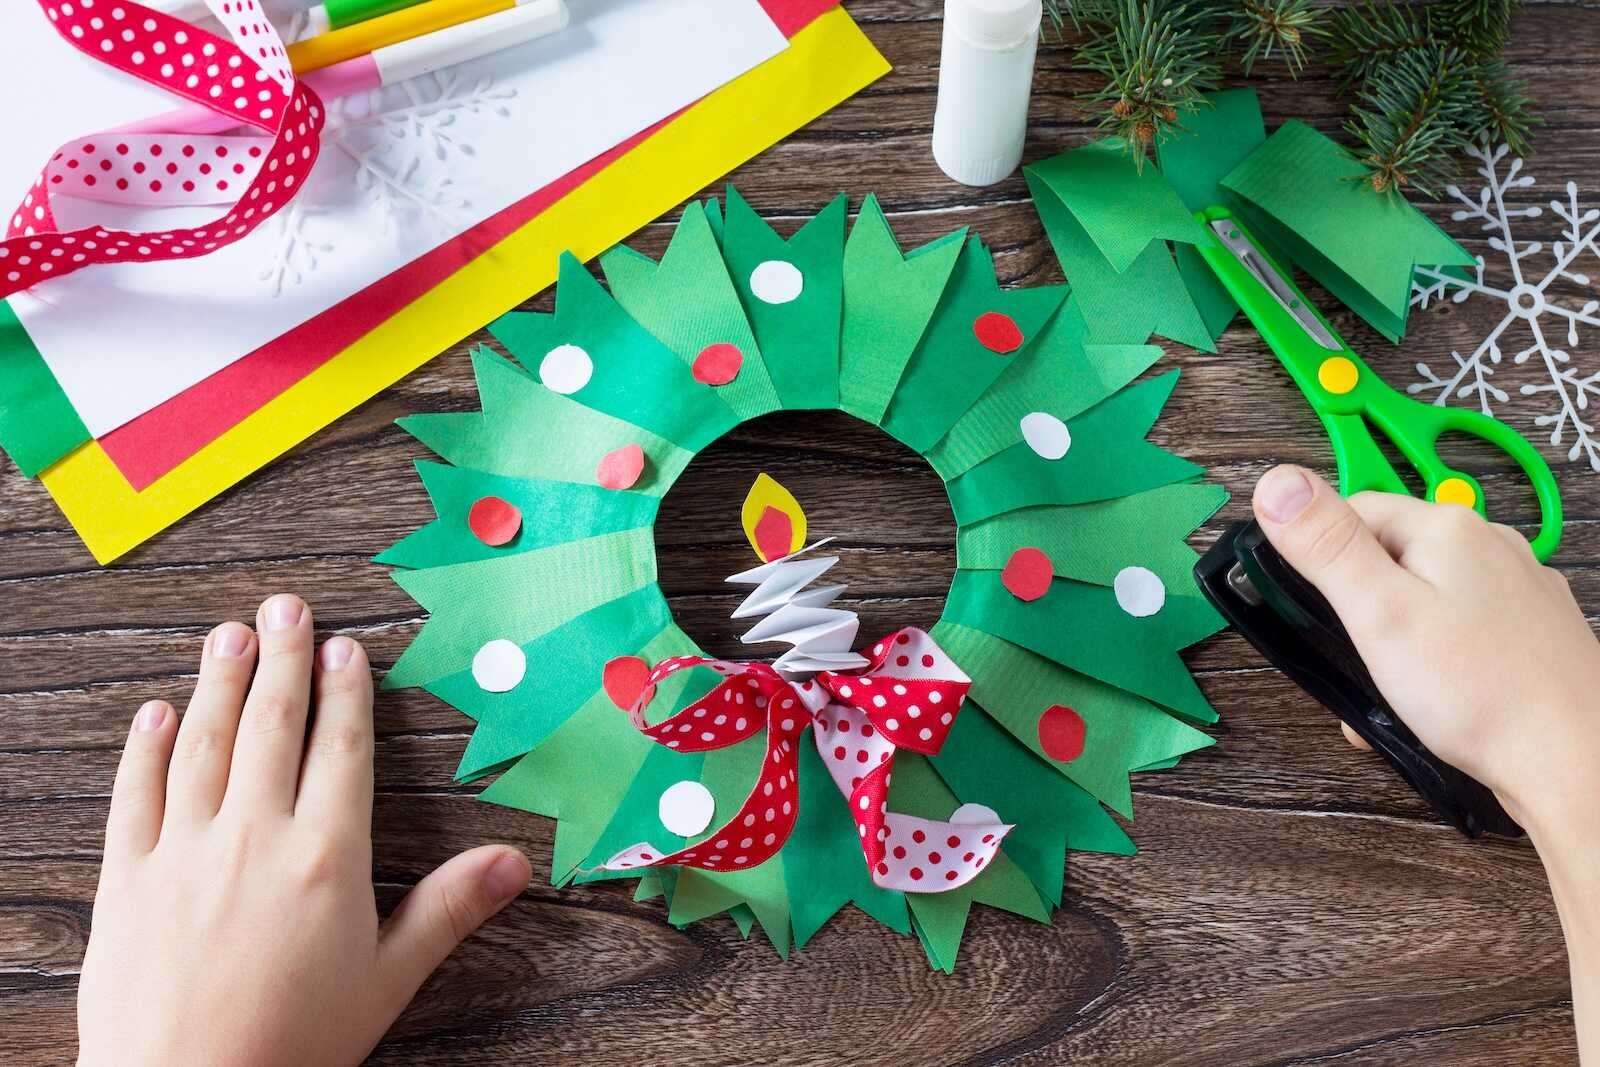
Step 8: Fold the White Paper Strip Like an Accordion
Take your white strip and fold it back and forth like a fan (accordion style). When you gently pinch the bottom and fluff the folds, it creates a 3D “candle” shape like you see in the photos.
Tip: Make crisp folds so it holds its shape better.
Step 9: Cut and Layer the Flame
Cut:
- 1 larger flame shape from yellow paper
- 1 smaller flame shape from red/orange paper
Glue the smaller flame on top of the yellow flame.
Step 10: Attach the Candle and Flame to the Wreath
Glue (or tape) the folded white candle piece to the bottom center of the wreath’s inner hole. Then glue the flame to the top of the candle.
In the images, the candle sits right in the center opening, standing out clearly against the greenery.
Extra secure option: Use a small piece of tape behind the candle plus glue in front.
Step-by-Step: Add the Ribbon Bow + Hanging String
Step 11: Tie a Ribbon Bow and Attach It
Tie a bow with your red-and-white ribbon. Place it near the bottom front of the wreath (right below the candle).
For the strongest hold:
- Staple the ribbon ends to the paper plate ring (adult help)
- Add a dab of glue on top to hide staples if needed
Step 12: Add a Hanger
Cut a piece of twine or yarn, loop it, and staple or tape it to the back/top of the wreath.
Now it’s ready to hang on:
- a doorknob
- a bedroom door
- a classroom hook
- the fridge (use a strong magnet or tape)
Helpful Tips for Crafting With Kids
- Use a glue stick for less mess, then add school glue only for heavier items like ribbon.
- Pre-cut for toddlers/preschoolers, but let them do the decorating (dots + bow placement).
- Make it an activity station: One child cuts, one glues greenery, one decorates with dots.
- Let it dry flat for 10–15 minutes before hanging so pieces don’t slide.
Fun Variations (Make It Your Own!)
- Name wreath: Add a paper banner with your child’s name and the year.
- Glitter wreath: Lightly brush glue and sprinkle glitter over the greenery.
- Button berries: Use red buttons instead of paper dots.
- No candle version: Swap the candle for a paper bell, star, or mini photo.
Quick FAQ
What age is this paper plate Christmas wreath craft best for?
Preschoolers can do it with help (especially cutting and stapling). Kindergarten–elementary kids can do most steps independently.
How long does it take?
About 30–45 minutes, depending on how much cutting you do during craft time.
Can I use tissue paper instead of construction paper?
Yes! Tissue paper looks softer and more textured, but it tears more easily—construction paper is best for beginners.
How do I make it sturdier for hanging on the front door?
Use cardstock for the leaf pieces, or glue two paper plate rings together for a thicker base.
Final Thoughts
This Paper Plate Christmas Wreath Kids Craft is a perfect mix of simple + special. Kids get to practice cutting, folding, and decorating, and you end up with a bright homemade wreath you’ll actually want to display. The layered green “leaves,” red-and-white dots, and that sweet 3D candle make it feel like a mini holiday masterpiece.